


Recent Recipes
'Tis the season for pumpkin...
Comments (0) | Thursday, November 1, 2012
Yeah, you caught me. I haven't posted in forever. I've baked many delicious things since my last post, including several other kinds of cheesecake, a French clafoutis, and some cookies. And I wasn't there to share them with you. Why? Because I'm mean. I'm just super mean. But I kind of feel bad, you know?
Kind of.
And so I'm doing you a favor by showing you these great pumpkin cupcakes with cinnamon cream cheese frosting. They're delicious, I tell you.
 |
| And you didn't even get to eat them. I'm a jerk. |
Ingredients
- 3/4 cup butter, softened
- 2-1/2 cups sugar
- 3 eggs
- 1 can (15 ounces) solid-pack pumpkin
- 2-1/3 cups all-purpose flour
- 1 tablespoon pumpkin pie spice
- 1 teaspoon baking powder
- 1 teaspoon ground cinnamon
- 3/4 teaspoon salt
- 1/2 teaspoon baking soda
- 1/2 teaspoon ground ginger
- 1 cup buttermilk
- 1 teaspoon ground cardamom (optional, but cardamom is AMAZING with pumpkin)
- 1 package (8 ounces) cream cheese, softened
- 1/2 cup butter, softened
- 4 cups confectioners' sugar
- 1 teaspoon vanilla extract
- 2 teaspoons ground cinnamon (I added extra for additional color)
- Chopped walnuts, garnish
- In a large bowl, cream butter and sugar until light and fluffy. Add eggs, one at a time, beating well after each addition. Add pumpkin. Combine the flour, pie spice, baking powder, cinnamon, salt, baking soda and ginger; add to the creamed mixture alternately with buttermilk, beating well after each addition.
- Fill paper-lined muffin cups three-fourths full. Bake at 350° for 20-25 minutes or until a toothpick inserted in the center comes out clean. Cool for 10 minutes before removing from pans to wire racks to cool completely.
- For frosting, in a large bowl, beat cream cheese and butter until fluffy. Add the confectioners’ sugar, vanilla and cinnamon; beat until smooth. Frost cupcakes. Refrigerate leftovers. Yield: 2 dozen.
Read More......
New York-style Cheesecake with fresh strawberry compote
Comments (0) | Thursday, July 26, 2012

For Savannah's late birthday and return from an amazing-looking Bahamas cruise (lucky girl), I baked her a cheesecake in a brand-new 8" Wilton springform pan. I wanted to start out with something pretty simple, as I had never baked a cheesecake before, and also, that crazy girl is the only woman in all the world who doesn't like chocolate. After baking it and letting it set, I added a strawberry compote. Strawberries were on sale at Hyde Park Produce, which was great because strawberries happen to be Savannah's favorite fruit. I then added picture on Facebook with the plan of telling Savannah that her boyfriend ate all of it the night before she came back from her cruise, having her be really crazy disappointed, and then whipping out a full, lovely cheesecake. Max (the aforementioned boyfriend) ruined those plans by telling her we hadn't touched it. Ruined all the fun.
Regardless, she was super happy when she got back, and for good reason. The crust was buttery and crunchy (the walnuts really did the trick) and the filling was just sweet, creamy, and slightly tart.
One thing I really hate about strawberry topping on cheesecake is that it normally tastes really fake and way too sweet. Why? It's normally canned pie filling. Yeah, even at the fancy bakeries, sometimes. It was much better to make a fresh one with just two ingredients: strawberries and sugar.
Well, here's the recipe:
New York-Style Cheesecake:
Ingredients:
- 1 1/2 c. crushed graham crackers
- 1/4 c. finely chopped walnuts
- 1 tbsp sugar
- 1/2 tsp cinnamon
- 1/2 c. melted butter
- 3 8-oz. packages cream cheese (Philadelphia, preferably)
- 1 c. sugar
- 2 tbsp AP flour
- 1 tsp vanilla extract
- 1/4 c. heavy cream
- 3 eggs, beaten
- 1/2 tsp lemon zest
 |
| The unbaked cheesecake filling |
- Preheat your oven to 375 degrees.
- Combine graham crackers, walnuts, 1 tbsp sugar, cinnamon, and melted butter. Press the mixture down into the bottom of the springform pan, making sure the bottom of the pan is covered. Try to press some of the mixture up the sides of the pan as well, as far up as you can get. Set the pan aside.
- In a separate large mixing bowl, cream together the cream cheese and sugar. Add in the flour and vanilla, and combine well.
- Beat in heavy cream until smooth. Add in more if the texture isn't smooth enough. Mix in lemon zest.
- Bake for 40-45 minutes. The cake is done baking if it jiggles a little in the middle and is set along the edges when you shake it a bit.
- Remove the springform pan from the ovefn, and let it cool on a wire rack for about 15-20 minutes.
- Loosen the walls of the cheesecake from the sides of the pan with a knife. Take off the wall of the springform pan carefully, making sure not to screw up the edges too badly.
- Let the cake cool completely on the rack. Cover the cake and chill for at least four hours (mine was overnight).
 |
| The finished cheesecake. Note the huge crack in the surface. This is usually prevented by a bain-marie, which I chose not to do. |
The crack in the cheesecake was fixed at least on the surface using this tutorial. Super easy and fixes it enough to make it look alright. Regardless, it's much better-looking with the compote on top. Here's how to make that:
 |
| Starting to cook down and bubble |
Ingredients:
- 2 c. hulled and quartered strawberries
- 1/4 c. sugar
- Combine the strawberries and the sugar in a saucepan.
- On medium-high heat, cook the strawberries in the sugar, stirring occasionally. The strawberries should start to release lots of juice.
- Turn off the head when the mixture thickens. It will continue to thicken as it cools.
 |
| The finished compote |
Read More......
Snickerdoodle cupcakes!
Comments (0) | Sunday, July 15, 2012

In any case, these cupcakes were a hit, and one of my teammates told me he liked what I did with the frosting. Buttercream tends to be very heavy, so I lightened it up slightly by adding some heavy whipping cream and mixing it into the frosting.
Anyway, here is the recipe:
Snickerdoodle Cupcakes
Cake:
- 3/4 c. AP flour
- 3/4 c. cake flour
- 1/2 tbsp baking powder
- 1/4 tsp salt
- 1 tsp cinnamon
- 1/2 c. butter
- 7/8 c. sugar
- 2 eggs
- 1 tsp vanilla extract
- 2/3 c. milk
- 1/2 c. butter
- 2 c. powdered sugar
- 2 tbsp heavy cream
- 1 tsp vanilla extract
- 1/2 tsp cinnamon
- Preheat your oven to 350 degrees and line one 12-cup cupcake pan.
- In a large bowl, combine flours, baking powder, salt, and 1 tsp cinnamon.
- Cream the butter and sugar together until fluffy.
- Add eggs gradually, mixing after each one. Then add in the vanilla extract.
- Alternate adding milk and the dry ingredient mixture. Blend well.
- Fill the batter into the baking cups 3/4 full.
- Bake for 18-20 minutes. Toothpick test!
- Let the cupcakes cool on a wire rack. Remove them from the pan after about half an hour or so.
- Beat your butter until it's fluffy.
- Add the powdered sugar, half the heavy cream, the vanilla extract, and the cinnamon, beating them together gradually at a low speed.
- Increase the speed on your mixer and mix until the frosting is stiff.
- Add the remaining heavy cream and blend well.
- Pipe onto the cupcakes when the cakes are completely cool.
Read More......
Cute little lemon tea cookies!
Comments (0) | Monday, May 21, 2012
I made sweet tea cupcakes with lemon buttercream a couple of weeks ago (forgot to take pictures, so no post, sorry!), and I had a couple of lemons left over. The weather was beautiful and springy and wonderful (you learn to appreciate sunshine a lot when you're in Chicago), and so I also wanted to make something that tasted like spring and sunshine. Therefore, I made these cute lemon thumbprint tea cookies. The dough made a simple butter cookie that flakes wonderfully when you bite into it, and the homemade filling tasted really tart and fresh. Pretty awesome. I made over 70 for a house meeting, and the people who live in my dorm ate them in about ten minutes. Those who came in late were sorely disappointed (if you want delicious cookies, you cannot be late).

Ingredients:
Cookie
- 1 c. butter or margarine, softened
- 1/3 c. powdered sugar
- 1 tsp. vanilla
- 1 2/3 c. AP flour
- 2/3 c. sugar
- 2-3 tsp lemon peel
- 3 tbsp. lemon juice
- 1 tsp. corn starch
- 1 tbsp. butter or margarine
- 1 beaten egg
- 1/4 tsp. salt
 |
| Step 4, like so. |
- Pre-heat oven to 350 degrees.
- Using an electric mixer, combine butter, powdered sugar, and vanilla until well mixed and fluffy.
- Gradually mix in flour until a nice thick dough forms.
- If the dough is a little sticky, stick in in the refrigerator or freezer for a while. When it's workable, roll the dough into 1-in. balls, and you know, like thumbprint cookies, press your thumb into them.
- Now we want to get started on the lemon filling. This is super easy. Mix all the ingredients pretty well.
- Put them all in a pot and heat them (low heat) on a stove. Stir often. You want it to start to thicken and become all congealed.
- Remove the pot from heat, and let the mixture thicken and solidify more.
Spoon the thickened filling into the cookie thumbprints.
Step 6, like so. Ignore the one-handled pot. - Bake the cookies for 8-10 minutes, until lightly golden brown.
- Put the cookies on a cooling rack.
- Garnish with powdered sugar once cooled.

Read More......
Vanilla Cupcakes with Clementine Vanilla Buttercream
Comments (0) | Tuesday, May 1, 2012

- 1/2 c. butter
- 1 c. sugar
- 1 c. flour
- 1 1/4 tsp baking powder
- 1/2 tsp salt
- 2 egg yolks
- 1/2 tsp vanilla extract
- 7 tbsp milk
- Preheat oven to 375 degrees.
- Mix butter and sugar using a mixer until well combined.
- Add in flour, salt, and baking powder. Mix well.
- Add in wet ingredients (egg yolks, vanilla, milk) and mix.
- Pour into muffin cups about halfway.
- Bake for 15-20 minutes (toothpick test!).
- 1/2 c. butter (room temperature)
- 3.5 c. powdered sugar
- 1 tsp milk
- 1 tsp vanilla extract
- 2 clementines
- Peel clementines and chop/crush them up.
- Mix butter and powdered sugar until creamy.
- Add in milk and vanilla extract. Mix well.
- Add in the clementines. Mix again.
Read More......
SUPER FLUFFY Irish Cream Cake
Comments (1) | Friday, March 23, 2012
 It's nearing the end of the week of St. Patrick's Day, and I had promised some friends that I'd bring something over last night. I found myself with very little time, and therefore couldn't make the Bailey's Irish Cream cupcakes that began my little cupcake obsession (they tend to take me an hour or two to prepare, and I wanted something that I could make in about half an hour). And so... I resorted to something I rarely do: cake mix. It's been such a long time since I've had a date with Betty Crocker, so at first it was awkward. Like any date with an old friend you haven't spoken to in years, naturally.
I wasn't about to make a ho-hum boxed cake that's subtly spiked with some Irish cream. So... I did a little experimenting, and it turned out as this fluffy, moist, and very slightly boozy cake with a lovely flaky top. How does one make THAT out of boxed cake (not that I don't respect you to the utmost, Mrs. Crocker)?
Things I learned from this cake:
- No one is limited to a boring boxed cake.
- Interesting things happen when you swirl frosting INTO the cake!
- Whipped frosting makes the cake fluff up more (although I guess that makes sense).
- If you don't know what else to do with your cake before you throw it in the oven, ADD SO MANY CHOCOLATE CHIPS. Like how many? SO MANY. An entire 12 oz. bag went into here. Why add more chocolate chips? I am woman, therefore I love chocolate. By rule of the chocolate lover's creed that reads "one can never have enough chocolate," more chocolate chips = better.
So... without further ado, here is the recipe:
Fluffy/Flaky Irish Cream Cake (makes one 13x9 sheet cake)
- 1 box of yellow cake (feel free to use any other kind as well!)
- 1/3 cup vegetable oil
- 2/3 cup Bailey's or Carolan's Irish Cream
- 3 eggs
- 1 can of your choice of frosting (I used whipped cream cheese frosting by Pillsbury)
- 1/4 cup of Irish Cream
- 1 12 oz. package chocolate chips (or as many as you'd like... white chocolate, butterscotch, peanut butter, or vanilla chips would work as well)
- Preheat your oven to 350 degrees.
- Mix yellow cake mix, eggs, and 2/3 c. Irish cream into a bowl. Pour half of it into the baking pan.
- In the bowl with the remainder of the batter, empty out the can of frosting, and stir in 1/4 c. Irish cream and however many chocolate chips you want in there. Combine well.
- Spoon out the batter-frosting mixture onto the top of the batter in the baking pan.
- Swirl things around with a fork.
- Optional: sprinkle chocolate chips on top of your unbaked cake as well.
- Bake for 25-30 minutes.
And voila... you end up with the fantastic deliciousness of a fluffy Irish cream cake.

Read More......
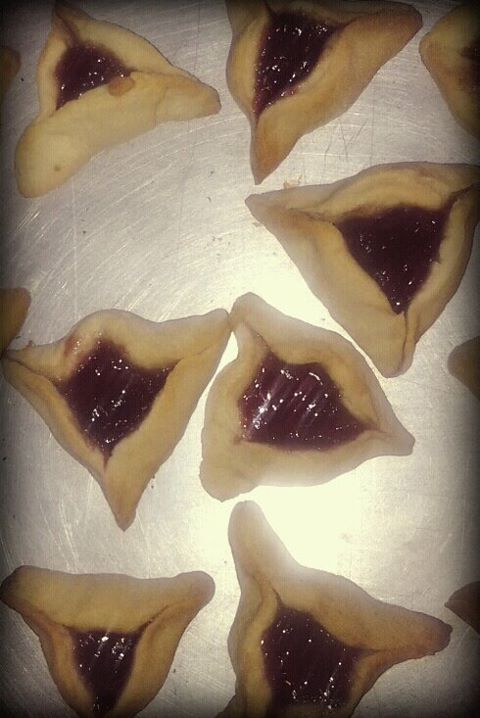
Post-Purim Obsession - Hamantaschen!
Comments (0) | Tuesday, March 20, 2012
 When I first arrived at the University of Chicago in the fall of 2010, I met one of my current closest friends, Anna. We shared a suite in the dorms during first year, and from the very first time we laid eyes on each other we became inseparable, and it was magic.
Well, actually, it was quite awkward at first. I guess that's what happens when you introduce yourself with the story of how a beverage cart on the plane nearly broke your arm. "Hey, you must be Connie! Nice to meet you, I'm Anna!" "Hi! I nearly died!" Yeah... that pretty much guarantees you an awkward start. Later in the week, we took a tour of the city, which was absolutely beautiful. I sat next to Anna. Throughout the entire trip, we probably spoke about two words to each other. Mostly because I'm partially socially inept and just generally bad at making small talk with people I don't know very well. That and the only thing she knew about me was that I had some recent near-death experience.
In any case, we're very close friends now. Anna takes me on random adventures across the city on occasion, and she introduced me to the greatness that is Improv Shakespeare earlier this year.
On one of our most recent adventures, we (foolishly? brilliantly? perhaps both) signed up to make study break (a time when someone makes snacks for everyone else in our part of the dorm). And because a) Anna is Jewish, b) I'm not Jewish but oddly interested in Jewish holiday traditions, as long as I don't have to fast, and c) Purim was in a few days, we decided to make hamantaschen (which my browser wishes to correct as "enchantments") for probably between 20 and 30 people. I, as a gentile, and she, as not someone who bakes often, did not know what kind of task we were signing up for.
We doubled a recipe we found on Allrecipes by Sharon in order to feed the horde of hungry and stressed college students and learned some things...
- SO MUCH FLOUR. Hamantaschen are really, really doughy, and combining 11 cups of flour into anything is tough with a bad hand mixer and bowls that aren't quite big enough for the task.
- Orange juice helps to make a truly flavorful cookie.
- It's pretty difficult to keep the triangle shape looking nice. Well, at least it was for me. Anna's Jewish intuition must have made her an excellent triangle pincher.
Easy Hamantaschen (makes 24)
Ingredients
- 3 eggs
- 1 cup granulated sugar
- 3/4 cup vegetable oil
- 2 1/2 teaspoons vanilla extract
- 1/2 cup orange juice
- 5 1/2 cups all-purpose flour
- 1 tablespoon baking powder
- 1 cup fruit preserves, any flavor
Directions
- Preheat oven to 350 degrees F (175 degrees C). Grease cookie sheets.
- In a large bowl, beat the eggs and sugar until lightly and fluffy. Stir in the oil, vanilla and orange juice. Combine the flour and baking powder; stir into the batter to form a stiff dough. If dough is not stiff enough to roll out, stir in more flour. On a lightly floured surface, roll dough out to 1/4 inch in thickness. Cut into circles using a cookie cutter or the rim or a drinking glass. Place cookies 2 inches apart onto the prepared cookie sheets. Spoon about 2 teaspoons of preserves into the center of each one. Pinch the edges to form three corners.
- Bake for 12 to 15 minutes in the preheated oven, or until lightly browned. Allow cookies to cool for 1 minute on the cookie sheet before removing to wire racks to cool completely.
We doubled this recipe, but it somehow made over 70 cookies... I wonder how big everyone else made their hamantaschen! These turned out amazingly, though. The cookie part was firm but crumbly when you bit into it, and it had a slightly sweet and very slightly tart flavor. We used cherry preserves (with a name like Smucker's...) because Anna asserted both that cherry hamantaschen were the best and that any flavor other than cherry and lemon would be an utter travesty. I trusted her judgment, but perhaps I'll experiment a bit next time. We also had to bake for quite a bit longer than what the recipe says. I took them out of the oven after 15 minutes, and the dough was cooked through, but Anna (who would know more than I would) insisted that they should be more brown and harder. This sometimes needed twice the baking time, but it turned out great.

Read More......